Sunday, July 21, 2013

Vacation

Dear Readers,

I am sorry I haven't had a chance to post. I've been busy getting things ready for this kids camp that I go to every year. I'm still trying to figure out a writing schedule so that I post things on time but seeings how I'm leaving in 1.5 hours, I don't think I'll get a chance to post until Saturday. Do not fret, however, because I have some pretty cool stuff to show off. Here's a sneak preview at one of the things I've done:


Yeah, I know. It's geek-tasticly awesome. I have the step by step of how I made this little beauty (my own design, thank you very much), and a few other things. Those are all to come so don't you worry your little heads about it. Until next week, dear ones, allonsy live long and prosper!

Tuesday, July 16, 2013

DIY storage floor pouf

Since I redid my bedding, my curtains no longer matched. Another problem is now I have an extra set of sheets in addition to my winter bedding (hard life, I know). So, I decided to take on both these problems at the same time by making a function storage piece for my living room. Here's some of my inspiration:


When I looked into how to make one of these a little more, I found out that the first picture followed the pattern and directions from the second picture. Perfect, right? So, I won't be going step by step through the process since that has already been so nicely done right here. Instead, I'll just add in the parts where I veered from the original pattern.

First, I took the pattern cutout and laid it out on my old curtain (after ironing lightly and wiping off all the cat hair I could).

It's true, I don't have a table. I've been using my hope chest both as fabric/ yarn storage and as a craft surface.
Here comes the first thing that I did differently. Instead of laying out and cutting along the side with scissors, I used my chalk pencil to mark the corners. I can never cut a straight line while holding the fabric up and I wanted this to be as straight as possible.


I did this for each of the 8 pieces, making sure that it all matched up with the original pattern.


When I was completely finished, I had cut up a little over half of my Ikea curtain panel (I still have a complete one to transform into something else later).


Now, in the original pattern, the next step is to sew all the pieces together. Here is another alteration that I made. Since I wanted this floor pouf to be function, I didn't want to sew up all my blankets into it and not be able to retrieve them later on. I thankfully have a drawer full of old zippers, one of which was a nice long invisible zipper. Since I had never sew in one before, I once again turned to the internet for some help. These two sites proved to be very helpful: Sew Serendipity and  Coletterie. As they both suggest, I ironed my zipper flat, then pinned it to my fabric.

It was long enough to extend from one corner, almost all the way to the bottom
 Unlike the two invisible zipper instructions, I don't have a zipper foot. Instead, I right aligned my needle and carefully lined up my zipper in the middle of the foot. Starting slowly at first, especially after ironing the zipper, sewing it on this way was fairly easy.


After finishing the zipper, the only difference in sewing it was that I didn't have to leave a 10" opening to flip (simply open the zipper up). Once done, I started with putting in the extra comforter I have.


Following that I put in all the bed sheets and heavy blankets.


Finally, I squished in all the pillow cases and smaller blankets into the corners to even out the shape. Once all the blankets were inside (all but one fit!), I zipped it up.


I was so stoked at how perfect it turned out. Perfect size and shape, that is; my sewing could probably still use some work.

Still a little lumpy looking. I was eager to try it so I didn't spend much time smoothing everything out.
I think he likes it (Skitter moving around to get extra comfy and lay down)
Eventually I would like to add an off white doily to the top to tie it together more with my furniture but for now, it's great!

Difficulty: Beginner
Time to complete: 1-2 hours
Price: $0

You can really make this out of just about any spare fabric, could easily have a smaller zipper, be filled with whatever you're wanting to store, and done by any beginner. Just follow the instructions, try your best to sew straight, and you're golden!


Until next time, dear readers, live long and prosper!

Sunday, July 14, 2013

Reading: Bible in a year

Part of bettering myself includes reading and, of those reading materials, includes the Bible. Growing up Christian, going to a Christian university, and getting one of my degrees in Christian Ministry means that I've read a good portion of the bible. However, I've always felt that I'm missing out on taking time each day to go through the entire bible. All over the internet there are lots of bible reading plans to fit just about any desire. For my boyfriend (who agreed to do a daily devotion with me) and I, we wanted a year long, chronological bible reading plan. These aren't hard to come across but, to fit with the rest of my bettering binder, I had to put it to some color. Once again, I've linked the picture below to the Google doc so you can follow along with us.
I know the font here is a tad small but, it's much more legible when printed out
If you're not into printing things out, don't worry. There's also a great (free!) app that you can get on any Android or Apple device. It's called YouVersion Bible App and gives you everything you would ever want in a bible app.


You can choose your favorite version to read (NIV, KJV, Message, you name it), the length of bible plan you'd like to try, add notes or highlight to your hearts delight, and sync it with all your devices so you're always sure where you're at with your plan.

My boyfriend, Jeremiah, and I are so far on day 14 (being that we started on July 1st) and have enjoyed reading through the beginning of Genesis and all of Job. What I've learned is that it's good to have an accountability partner who is just as interested in completing a goal as you are. We used to get up and, right away, turn on the news. For the last 14 days, though, we get up 30minutes earlier than we used to and, while he gets the coffee, I find where we are at. Then we alternate reading the passages for the day, each day (so today it was his turn to read). It has become a great start to our day. Well, that's all I have for today, dear readers. Until next time, live long and prosper!

Saturday, July 13, 2013

Working out: Running

When it comes to training for a race, its hard to know where to start. Thankfully we have the internet which is filled with various workout plans. Two key things to always keep in mind when deciding on a plan - make sure it starts where you are already at and have rest days. In order to improve, you always have to push yourself but if you push yourself too far, you can get hurt. For myself, I'd like to think that someday I'll be able to run a marathon so I went in search of a long term plan that had that as the end goal. Here's what I found:


26-Week Marathon Training Schedule
WeekMonTueWedThuFriSatSunTotal
1Walk 20 min.RestWalk 20 min.Walk 20 min.RestWalk 20 min.Rest80 min.
2Run/Walk 20 min.RestRun/Walk 20 min.Run/Walk 20 min.RestRun/Walk 20 min.Rest80 min.
3Run/Walk 25 min.RestRun/Walk 25 min.Run/Walk 25 min.RestRun/Walk 25 min.Rest100 min.
4Run/Walk 30 min.RestRun/Walk 30 min.Run/Walk 30 min.RestRun/Walk 30 min.Rest120 min.
5Run/Walk 35 min.RestRun/Walk 35 min.Run/Walk 35 min.RestRun/Walk 35 min.Rest140 min.
6Run/Walk 35 min.RestRun/Walk 35 min.Run/Walk 35 min.RestRun/Walk 35 min.Rest140 min.
7Run 20 min.RestRun 20 min.Run 20 min.RestRun 20 min.Rest80 min.
8Run 25 min.RestRun 25 min.Run 25 min.RestRun 25 min.Rest100 min.
9Run 25 min.RestRun 30 min.Run 25 min.RestRun 40 min.Rest120 min.
10Run 25 min.RestRun 20 min.Run 25 min.RestRun 30 min.Rest100 min.
113Rest43Rest5Rest15
123Rest43Rest6Rest16
133Rest43Rest7Rest17
143Rest53Rest8Rest19
153Rest53Rest10Rest21
164Rest54Rest11Rest24
174Rest64Rest12Rest26
184Rest64Rest14Rest28
194Rest74Rest16Rest31
205Rest85Rest16Rest34
215Rest85Rest17Rest35
225Rest85Rest18Rest36
235Rest85Rest20Rest38
245Rest85Rest9Rest27
253Rest53Rest8Rest19
263Rest3Walk 2Rest26.2Rest34.2

What I like about this plan is that it doesn't start with running 3 miles, as some are. In fact, while I've participated in a few 5k races, I don't think I've ever full on run more than a block or two (yeah, I'm really out of shape). Not only that but this plan gives me the okay on walking, not just the first week, but for the first 10 weeks! Even if I run out of energy to run a full marathon, I'll at least be able to run the two 5ks that I'm already signed up for at the end of the summer (Color Run on August 24th and Warrior Dash on September 7th). Plus, it has those much desired rest days that I mentioned.

Now, I've been following this plan for the last 3 1/2 weeks now. Something I realized that really should have been quite obvious: The more weeks that go by, the easier it is to run farther and longer. My boyfriend has been joining me on these run/walks and, without even realizing it, we're already up to jogging 2 miles!

Since I've also been implementing other workout plans (cycling, abs, pushups, and planks), I've put together a blank calendar that can be filled out for each month. I don't know why but colorful things to fill out is motivating to me (yeah, I'm weird). Anyway, I printed out a few of these and filled out my workout plan through to September (in preparation for the 5ks). Each day has a line for each of the plans I'm following just in case there's ever a day that I had to do all 5 (run, bike, abs, pushups, and plank). As I've now said twice, always have rest days so printing this out also gave me a good visual at how to organize my workout days so that I would indeed have a rest day (except for planks, I do that everyday). Since I'm just so nice, I've linked the picture below to the Google doc so you too can have a print out workout calendar (I tried embedding it but Google docs kept freaking out; sorry).
What I have also really appreciated about this calendar is each month I can set goals for myself and give myself a little inspiration (quote, before/ after picture, note from loved one, etc.). Well, that's it for now. Tune back each Saturday for more on working out, apps, and plans to follow. Until next time, live long and prosper!

Tuesday, July 9, 2013

DIY Bed Frame

Recently my parent's gave me their queen sized mattress. This was a big upgrade from my previous, full sized mattress in so many ways. For example, on my old mattress, when I wanted to roll over, I would grab a spring and have to pull myself - Yeah. It also didn't have a box spring; just two mattress on top of each other, so that was another huge upgrade. Anyway, so with a new mattress, I obviously needed a new frame but they can be expensive. For a quick fix, we went to home depot and bought those cheap cement blocks to put under the bed - it got it off the ground and that was fine by me.

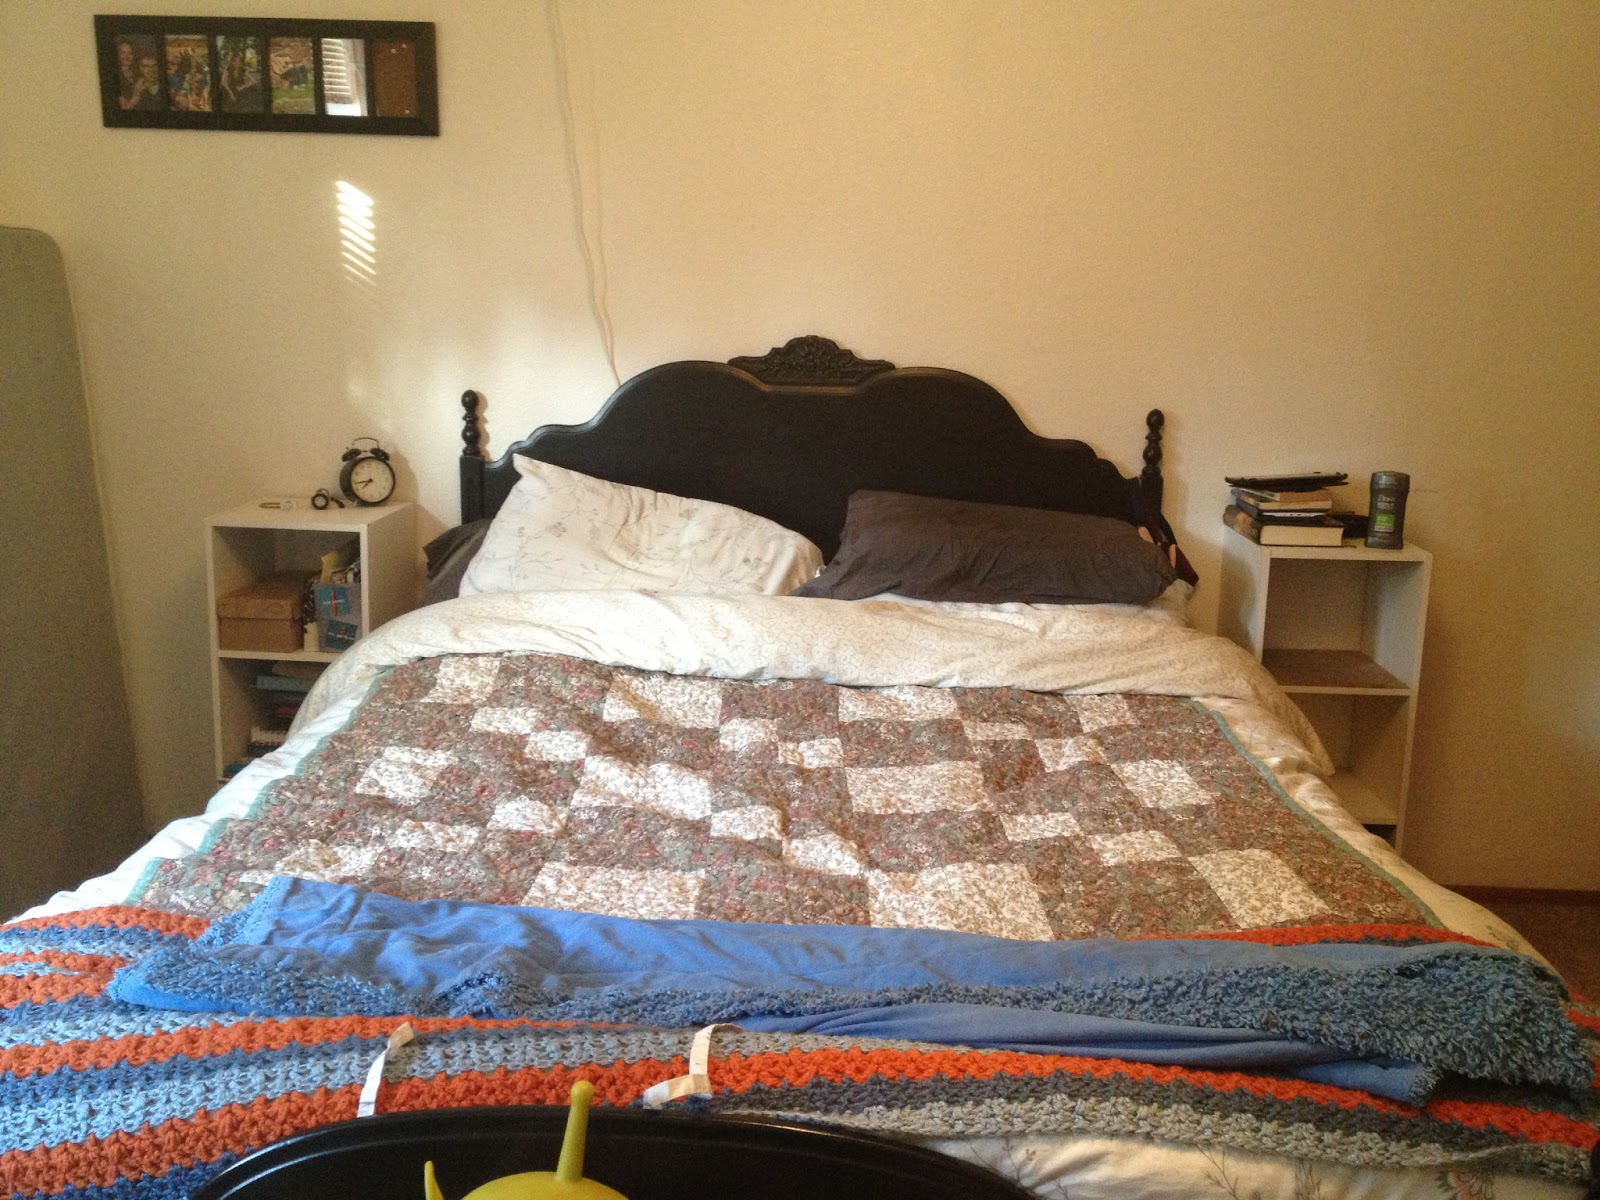
July 5th, since it was my birthday and I had some time on my hands, I really wanted to try my hand at making a frame for it... So I did just that (Happy birthday gift to myself)! First off, here's my before picture (with the new mattress but the same head/ foot boards from my full sized bed):

1 old mattress off to the left (we sold the other one)
As a person of the internet, I've seen lots of DIY bed frames but the ones that I especially liked didn't have any plans or how tos so I opted to make my own. However, I'm more of a plan in my head kind of person, so drawing really isn't one of my strong suits. Well, here's the idea I had:
Nothin' too fancy
The idea is that instead of building the entire frame and, since I live in an apartment (not wanting to attach it to the wall), I would put L brackets (is that what they're called?) on the bottom corners of each to be sandwiched between the cement blocks and the box spring. That is, the weight of the box spring and mattress would hold up the frame. This would mean, however, that whatever materials I got would need to be much lighter than a typical frame. With all this in mind, we set out for good ole' Home Depot.

We walked around the wood section until I found some wood that were light, were about the right size (6' pre-cut wood, though eventually I wanted them to be 5.5'), and were cheap. $1.88 per board cheap.

Hard wood cedar is what the tag says; I think they're usually used for fences

Since they weren't exactly 1/2 foot tall, we bought one more than I originally planned to for both ends of the bed making our material list as follows:
  • 14x 6' hard wood cedar boards ($1.88 each)
  • 3x fence boards (I'm not entirely sure on the size but they were longer than those pictured and approx. $3.00 each)
  • 4x L brackets (in the fencing hardware section around the corner)

Since I live in an apartment, I also had to buy everything to assemble them together:
  • box of screws (I already had some at home with my Ikea tool set)
  • 2x sanders
  • hand saw
  • Wood stain (Dark Walnut)
  • 9' x 12' plastic (to try and conceal the mess that I knew was to come)

Overall, I spent $50-60 on the entire frame and materials. Not bad, huh? When I got home, we transformed our little dining room (which we're using as an office/ craft space) into a workshop.

Skitter, one of my cats, wanted to see what all the commotion was about
 First step was to measure all the boards and cut them to size. The thinner, cedar ones were cut down from 6' to 5.5'. Then the longer ones were cut down so I had 2x 4'8" (for the headboard) and 2x 2'8" (for the footboard). Once finished, we got to sanding.

Jeremy, my boyfriend, was a huge help
Actually, what ended up happening is while Jeremy was sanding the boards, I would stain the ones that were all done, in hopes of speeding up the process.


As a note, if you're doing this inside your house: Be prepared for lots of sawdust everywhere! Okay, well it wasn't really that bad throughout the apartment but the dining room definitely needed cleaned at the end of the day.

Back to the staining: for the headboard, I only stained the front sides and edges of the boards to save time, stain, and dry time. It's not like anyone is going to see them anyway. After 1.5 hours of working hard, this is what we had:

The eventual headboard
All but a few boards cut, sanded, and stained. At this point, we took a short dinner break to let the stain dry. Most of the boards were fine but we were pretty exhausted from speeding through everything (The goal was to have the bed done by the end of the night so we could actually use it). Next up was piecing it all together.

First we laid out the back planks on top of the bricks we used earlier to cut the wood (I stole them from under the bed so I wouldn't have to cut up my floor) and then organized the 9x boards on top.
We started with placing the top and bottom boards first

Then all the rest were put in place
We measured every which way to ensure that everything was just right: The bricks were measured out so that, with the boards laying on top of them, they were in the same positions they would be under the bed. Centering the planks on those, then ensuring that the boards started exactly 8" from the bottom, we started screwing in each of the boards. Now this step probably took us the longest because I forgot to charge the screwdriver battery ahead of time. Occasionally I would get impatient and just hand screw them in but that really took the energy out of me.

With the boards being a tad taller than I thought, as mentioned earlier, the did end up being longer then the back boards holding them together but only by 1-2 inches. Next up was placing the L brackets. We lined them up with the boards (no measuring required this time) to ensure that it would fit snugly between the cement block and box spring, then screwed them in place.


With that all done, we repeated the process with the footboard. This time it went much quicker: Not as many boards, the screwdriver was charged, and we knew what we were doing.


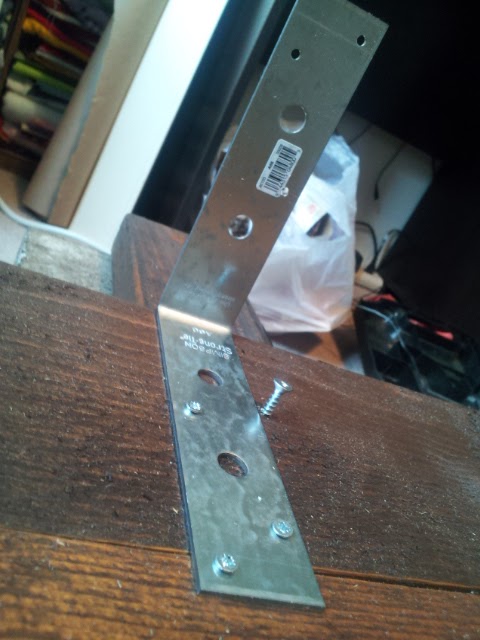
The final step, then, was just putting it in place. Here you can see how the sandwiching of the bracket works:

Board isn't pushed in all the way but, when it is, the back board will be right up against the cement block

And, viola, we're done!

Here's a picture from the night we finished
And here's a picture I took this morning
So, $60 of materials and roughly 6 hours later, we had a whole new bed. Oh, I forgot to mention that I also bought all new sheets and such to go with the new bed. I bought my old sheets when I first moved in over 2 years ago and they were definitely showing it. The duvet cover was from Ikea and the rest of the sheets were from Target. Oooh! the bed sheets are not only a higher thread count than my old sheets (325) but, since they're organic they'll get softer over time (yay!).

And there you have it: a DIY bed frame for under $100 that can be made in under a day. I'll eventually complete the frame by putting in side boards but for now, on my budget, this will do just fine :) If you have any questions or comments about the process, feel free to comment below. Until next time, dear readers, live long and prosper.


Friday, July 5, 2013

Planning a road trip - Attractions and activities

Now that you've got a basic idea of what you're wanting your road trip to look like, its time to start planning what you're going to do along the way to your destination. I would suggest putting together a binder or, perhaps, online work folder to keep all your planning together. In fact, I still have my binder from when I planned a lighthouse road trip for my mom and I. I can go back and do the same trip again, if I wanted to, because all my planning, brochures, and other things I collected along the way are in there.

Old binder (Oregon coast, 3day round trip) next to the new one (Oregon to Arkansas, 8 days)
I like to have a master schedule at the start and then everything else is organized by day
Start with plugging in your starting and ending addresses into Google maps. Now, from A to B it may take less time than what you've originally planned and that's okay... for now :)

For example, for my trip it would take 3 days of straight driving to get from Albany, OR to Fort Smith, AR but I was given 6-8 for the trip.
At this point, with the purpose of your trip in mind, grab that purple (or is it blue?) line with your clicker, and drag to desired stops. This stage of planning is just to focus on the big stops. Remember, it's not just stopping and then moving on, you're going to want to spend time at each stop. Depending on how far you have to drive, try only having 1-2 big things per day of the trip.

After talking to each of my siblings about places they'd like to see, I set on making detours through Death Valley, Grand Canyon, Yellowstone, and Mount Rushmore. White dots are where the route was altered.
For my trip, even at this point we were still at only 5-6 days of driving but smaller stops and detours will be added along the way. What I like to do as I go through planning road trips, is to print out 1-2 pages of information on all the places we're going. This provides reading material that can be read out loud to everyone on the trip, educating them a little on the destination, while also saving time once getting there.

Here are my print outs for some of our Route 66 stops
Printing out and reading information ahead of time also gives insight on the places you're going and can save you time and money in the long run. For example, parking right next to the gift shop at the Hoover Dam costs $7 or you can drive across to the Arizona side of the Hoover dam and just up and around the corner is a free parking lot, plus you get the chance to walk and drive across the dam.

A great place to find information is at the states webpage. You can order a free road map and visitors guide for each state from those websites as well, just be sure to give it 4-8 weeks for them to be mailed to you (I ordered one at the beginning of June and it's still not here). Most state websites also offer electronic versions of the travel guides, if you're looking at saving a tree or two. Below are the links, just click on the state:


If you're looking at doing an in-state road trip it still might be a good idea to check out your states webpage to get an outsiders look at what's great about the place you live. You may discover something exciting and new.

Now get to planning and remember that it's supposed to be fun so don't stress it too much! Until next time, live long and prosper!

Thursday, July 4, 2013

Planning a roadtrip - The Basics

So you're planning a road trip. Well, here are a few things to keep in mind to get you started:

What is the purpose of the road trip? Weekend getaway? Moving cross country? Knowing this will help determine the time frame, how long to drive each day, how often to stop, and so on. In addition to the purpose of the road trip, decide on an object of comradery. Spending every moment of every day together, it can be easy to get on each others nerves but with something to unite all members of the trip, it can ease some of that tension. For my family, we considered shirts (but it would only be able to be worn one day and then be gross, plus it's a little too matchy-matchy) and bandanas (the boys weren't really down with that), but then my mom had the fantastic of idea of Buffs!

Bubble Buff
They're great because they are versatile, whisk away sweat, gender neutral, and made of strong material (no seam). The ways we wore them were as head bands, arm bands, face mask for sleeping (in the car and on the plane), neckerchiefs, and wrist bands (like a bracelet). Whenever we saw that someone wasn't wearing theirs, even after some tension, it boosted our spirits a bit to remind the person to put theirs back on.

How long do you have for the road trip? If you have a specific destination and time frame, it's especially important to keep this in mind when deciding on attractions to check out, fast food or sit down restaurants, and hours to drive in a day. For my family, we had 7-8 days (depending on when the movers would be at the new house) to drive cross country. The fastest route from Oregon to Arkansas only took 3 days but it also missed all the fun stuff that we wanted to see (Grand Canyon, Yellowstone, Mount Rushmore, etc). Instead, I planned for us to take probably the most indirect route possible :)

Our indirect route from Albany, OR to Fort Smith, AR

How many miles/ hours a day are you willing to drive? Remember that the longer you drive, the less time you may have in various road side attractions or other activities. Also to keep in mind is the number of drivers. If you're renting a car, keep in mind the regulations that are on the car (no one under 23/ 24 years old can drive). Are you willing to drive in the dark in order to get to a hotel closer to the next days activities? Or, are you willing to drive all the way through the night to save money on hotels and get to the next destination faster? Just a tip, we found driving through unfamiliar places at night is one of the most terrifying things ever and after the first few hours of doing so, we opted to cut some attraction short in order to not drive in the dark as long.

How much money are you willing to spend? At this point it may be a good idea to set a budget. Categorize it by day to get a better idea of how many days you can be on the road trip. Key areas to budget for are gas, hotels, food (restaurants and/ or packed), and attractions. Obviously some days you'll spend more or less than others but this is just a place to get started. For our road trip, some of these areas were pre-decided by my father's company who was paying to relocate my family (ex. food = $35/adult/day and $16/child/day = $137/day).

Those are my tips to get your road trip planning started. Tune in tomorrow for more on planning a road trip. Until then, dear readers, live long and prosper!

Wednesday, July 3, 2013

A new vision

During the roadtrip, I came to a conclusion on where I want to take this blog: For the next week, each day I will post on my process of planning the roadtrip complete with printables, links to websites, and app reviews. Following that, I will post 4 days out of each week on the following topics:

Sunday: Reading/ School
Classic books
School
Bible in a year

Tuesday and Thursday: DIY and crafts

Saturday: Working out
Cycling

Running
This blog originally started out as a way to motivate myself to workout. However, there are numerous areas of my life that I desire to better myself in. The roadtrip gave me time to think through just what those areas are and what better place to document that journey than right here. Due to that, I have also updated my mission statement [changes in italics] - "To explore strange new challenges, to seek out new DIYs and new adventures, to boldly go where I have never gone before." I greatly look forward to the future of this blog so, let me know what ya'll think. Any suggestions on apps I should review, DIYs I should try, workouts worth trying? Well, until my next post dear readers, live long and prosper!

Monday, July 1, 2013

Moving In and leaving

What a crazy few days it's been. Friday morning we woke up and had to run a few errands (including breakfast!) before heading to the new house. For months I wondered how I would react upon entering the house, or even if I would. I feared that I would be paralyzed, overwhelmed by the feeling of relief that we finally made it, happiness that all the stress of buying the house was over, and the sadness that this house was not my home and that there was no [bed]room for me. When we walked in, I tried to busy myself with taking pictures for mom's and my blog, ignoring how the house was just as empty feeling as I was (a little dramatic, I know).

Turning left from the entrance way is the formal living room and formal dining room

Walking straight from the entrance way are french doors going into the family room (entry to breakfast nook/ kitchen on left then door to backyard in center)

Standing in breakfast nook, facing front of house, is the kitchen and, through the door, the formal dining room
Now, when my parents decided on this house my mom informed me that it had an intercom system but that it most likely didn't work. I had never heard of such a thing even existing in a house so I was pretty stoked at how much an intercom system may improve communication and lower the volume in the house (no more yelling up and down the stairs or across the ouse at one another). As we walked through teh family room and into the kitchen, I saw it. I turned the dial and spoke. Next thing we all heard was my voice echoing throughout the house. "Forget about being sad! This thing is awesome!" was the very next thought :)


Then we turned around to be in the breakfast nook, which looks out on the backyard, and saw the sparkling blue pool!

Back of the house and the pool
I reminded myself that though I would be leaving in a few short days, I should make the most out of the time that I had left with them here. I decided that right then and there I was going to change my mood and just have fun with the new house. We ran around looking at the different rooms, unpacked the road trip SUV, and got ready for the pool.
Clarke's room
Blake's room
Clarke playing guitar before pool time
The boys got ready a lot quicker than the rest of us and tried out the hot tub (spying on them from mom and dad's room)
Even with an empty house, we had a lot to do and explore. Around 7pm, with our stomachs growling, dad took us off to one of his favorite restaurants: Boomerang Diner.


He explained that while the food isn't the most amazing, it's the environment and the people that really make it what it is.

So ready to eat and sleep!

I think we look more awake then the boys did
By the end of Friday, we were all exhausted, found comfy spots on the floor (except mom and dad, who had a blow up mattress), and passed out.

The next morning, Saturday, we were all up and ready for the movers to arrive. We quickly learned that you don't realize how much stuff you won until you have to unpack it all. We had a lot of fun finding spots for everything but it was exhausting. Halfway through the day I took a short break to take pictures of our progress.

Figuring out what goes where in the breakfast nook

Kitchen stuff was some of the first off the moving truck
Not too much in the family room yet
Blake was the first to get stuff for his room
We all worked really hard from the time the truck got there at 8am until almost 7pm, stopping only to grab some food and rest our feet. I was really impressed with my siblings who never stopped working, never complained, and were always available to help each other. At the end of the day, even though we were exhausted, we gathered together in the almost complete game room, and watched a movie (Twister!).

Sunday was almost exactly the same. We finally got to sleep in but once up we worked hard all day. At one point while I was walking through to put a box away, I found this.

I don't blame him
He only stayed there for five minutes and then was up and working hard again. Near midday, mom suggested we check out the library to see if they had wifi to update our blogs. We went but, obviously, their internet was not good enough to post anything. We also went to Books A Million (kinda like a amazon store, primarily with books, but also with fun little stuffs) and Walmart to do some grocery shopping. Since I wouldn't be with them for my birthday, mom suggested that I choose the meal as a birthday dinner. I almost always choose corn (on the cob) and fried zucchini. I was lucky that walmart had corn but I had to choose a different main food item - brocolli and chicken casserole. Then for dessert, I chose strawberry cheesecake. It will certainly be one of the things I miss most but perhaps I'll loose a little weight without it - mom's cooking. We ended another day with a swim in the pool, tested the hot tub, and watched my choice of a movie (The Postman with Kevin Costner). It was a fantastic day.

Now today is Monday and I am writing this in the Detroit airport (my connecting flight is delayed so I had enough time to hop on my laptop). Everything seems to be going by so quickly that being gone has fully hit me. Tears were of course shed but I expect many more in the near future. I love my family with my whole being and will miss them dearly. I'll miss seeing my siblings grow up, playing their sports, hanging out with friends, and goofing off. I'll miss having coffee with my mom in the morning. I'll miss the long debates my father and I have (even when they get a little heated). I know that it isn't goodbye forever and we're already making plans for the holidays. It's just goodbye for now; see you soon. I love you family! I always have and I always will. Now, I have to be off onto my flight, headed back to Portland. Until next time, readers, live long and prosper!