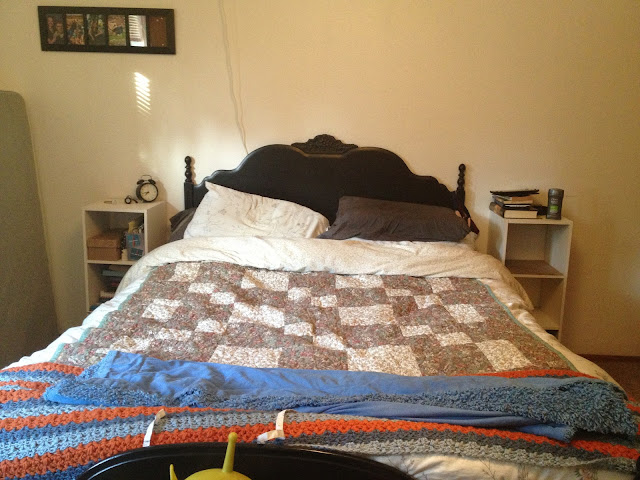
July 5th, since it was my birthday and I had some time on my hands, I really wanted to try my hand at making a frame for it... So I did just that (Happy birthday gift to myself)! First off, here's my before picture (with the new mattress but the same head/ foot boards from my full sized bed):
 |
| 1 old mattress off to the left (we sold the other one) |
 |
| Nothin' too fancy |
We walked around the wood section until I found some wood that were light, were about the right size (6' pre-cut wood, though eventually I wanted them to be 5.5'), and were cheap. $1.88 per board cheap.
 |
| Hard wood cedar is what the tag says; I think they're usually used for fences |
Since they weren't exactly 1/2 foot tall, we bought one more than I originally planned to for both ends of the bed making our material list as follows:
- 14x 6' hard wood cedar boards ($1.88 each)
- 3x fence boards (I'm not entirely sure on the size but they were longer than those pictured and approx. $3.00 each)
- 4x L brackets (in the fencing hardware section around the corner)
Since I live in an apartment, I also had to buy everything to assemble them together:
- box of screws (I already had some at home with my Ikea tool set)
- 2x sanders
- hand saw
- Wood stain (Dark Walnut)
- 9' x 12' plastic (to try and conceal the mess that I knew was to come)
Overall, I spent $50-60 on the entire frame and materials. Not bad, huh? When I got home, we transformed our little dining room (which we're using as an office/ craft space) into a workshop.
 |
| Skitter, one of my cats, wanted to see what all the commotion was about |
First step was to measure all the boards and cut them to size. The thinner, cedar ones were cut down from 6' to 5.5'. Then the longer ones were cut down so I had 2x 4'8" (for the headboard) and 2x 2'8" (for the footboard). Once finished, we got to sanding.
 |
| Jeremy, my boyfriend, was a huge help |
As a note, if you're doing this inside your house: Be prepared for lots of sawdust everywhere! Okay, well it wasn't really that bad throughout the apartment but the dining room definitely needed cleaned at the end of the day.
Back to the staining: for the headboard, I only stained the front sides and edges of the boards to save time, stain, and dry time. It's not like anyone is going to see them anyway. After 1.5 hours of working hard, this is what we had:
 |
| The eventual headboard |
First we laid out the back planks on top of the bricks we used earlier to cut the wood (I stole them from under the bed so I wouldn't have to cut up my floor) and then organized the 9x boards on top.
 |
| We started with placing the top and bottom boards first |
 |
| Then all the rest were put in place |
With the boards being a tad taller than I thought, as mentioned earlier, the did end up being longer then the back boards holding them together but only by 1-2 inches. Next up was placing the L brackets. We lined them up with the boards (no measuring required this time) to ensure that it would fit snugly between the cement block and box spring, then screwed them in place.
With that all done, we repeated the process with the footboard. This time it went much quicker: Not as many boards, the screwdriver was charged, and we knew what we were doing.
The final step, then, was just putting it in place. Here you can see how the sandwiching of the bracket works:
 |
| Board isn't pushed in all the way but, when it is, the back board will be right up against the cement block |
And, viola, we're done!
 |
| Here's a picture from the night we finished |
 |
| And here's a picture I took this morning |
So, $60 of materials and roughly 6 hours later, we had a whole new bed. Oh, I forgot to mention that I also bought all new sheets and such to go with the new bed. I bought my old sheets when I first moved in over 2 years ago and they were definitely showing it. The duvet cover was from Ikea and the rest of the sheets were from Target. Oooh! the bed sheets are not only a higher thread count than my old sheets (325) but, since they're organic they'll get softer over time (yay!).
And there you have it: a DIY bed frame for under $100 that can be made in under a day. I'll eventually complete the frame by putting in side boards but for now, on my budget, this will do just fine :) If you have any questions or comments about the process, feel free to comment below. Until next time, dear readers, live long and prosper.


That looks nice Ariel! Good job!!!
ReplyDeleteWay to go. I'm very proud of you. You have become an amazing woman!
ReplyDelete